There’s a smell that stays with me from my earliest forays into additive fabrication — the warm tang of PLA as fresh layers nestle into place under a glowing nozzle, the low hum of stepper motors dancing through another night of prints in my workshop. Over the years I’ve watched the 3D printing landscape evolve, machines becoming faster, more capable and kinder to the budding maker. Today there’s a fresh breeze on the horizon as Elegoo lifts the curtain on its latest creations: the eagerly anticipated Centauri Carbon 2 and its fully fledged sibling, the Centauri Carbon 2 Combo.
Elegoo Unveils a New Chapter in Desktop 3D Printing with the Centauri Carbon 2 Series
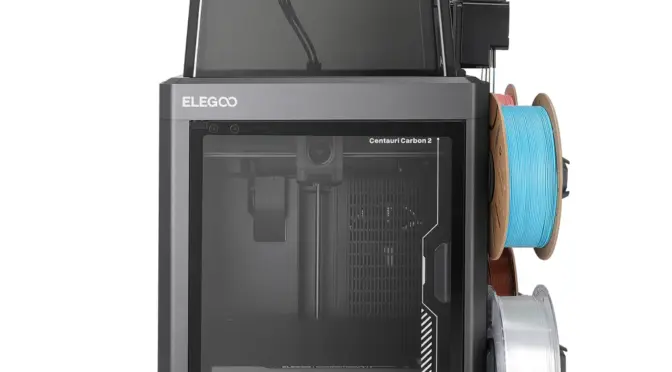
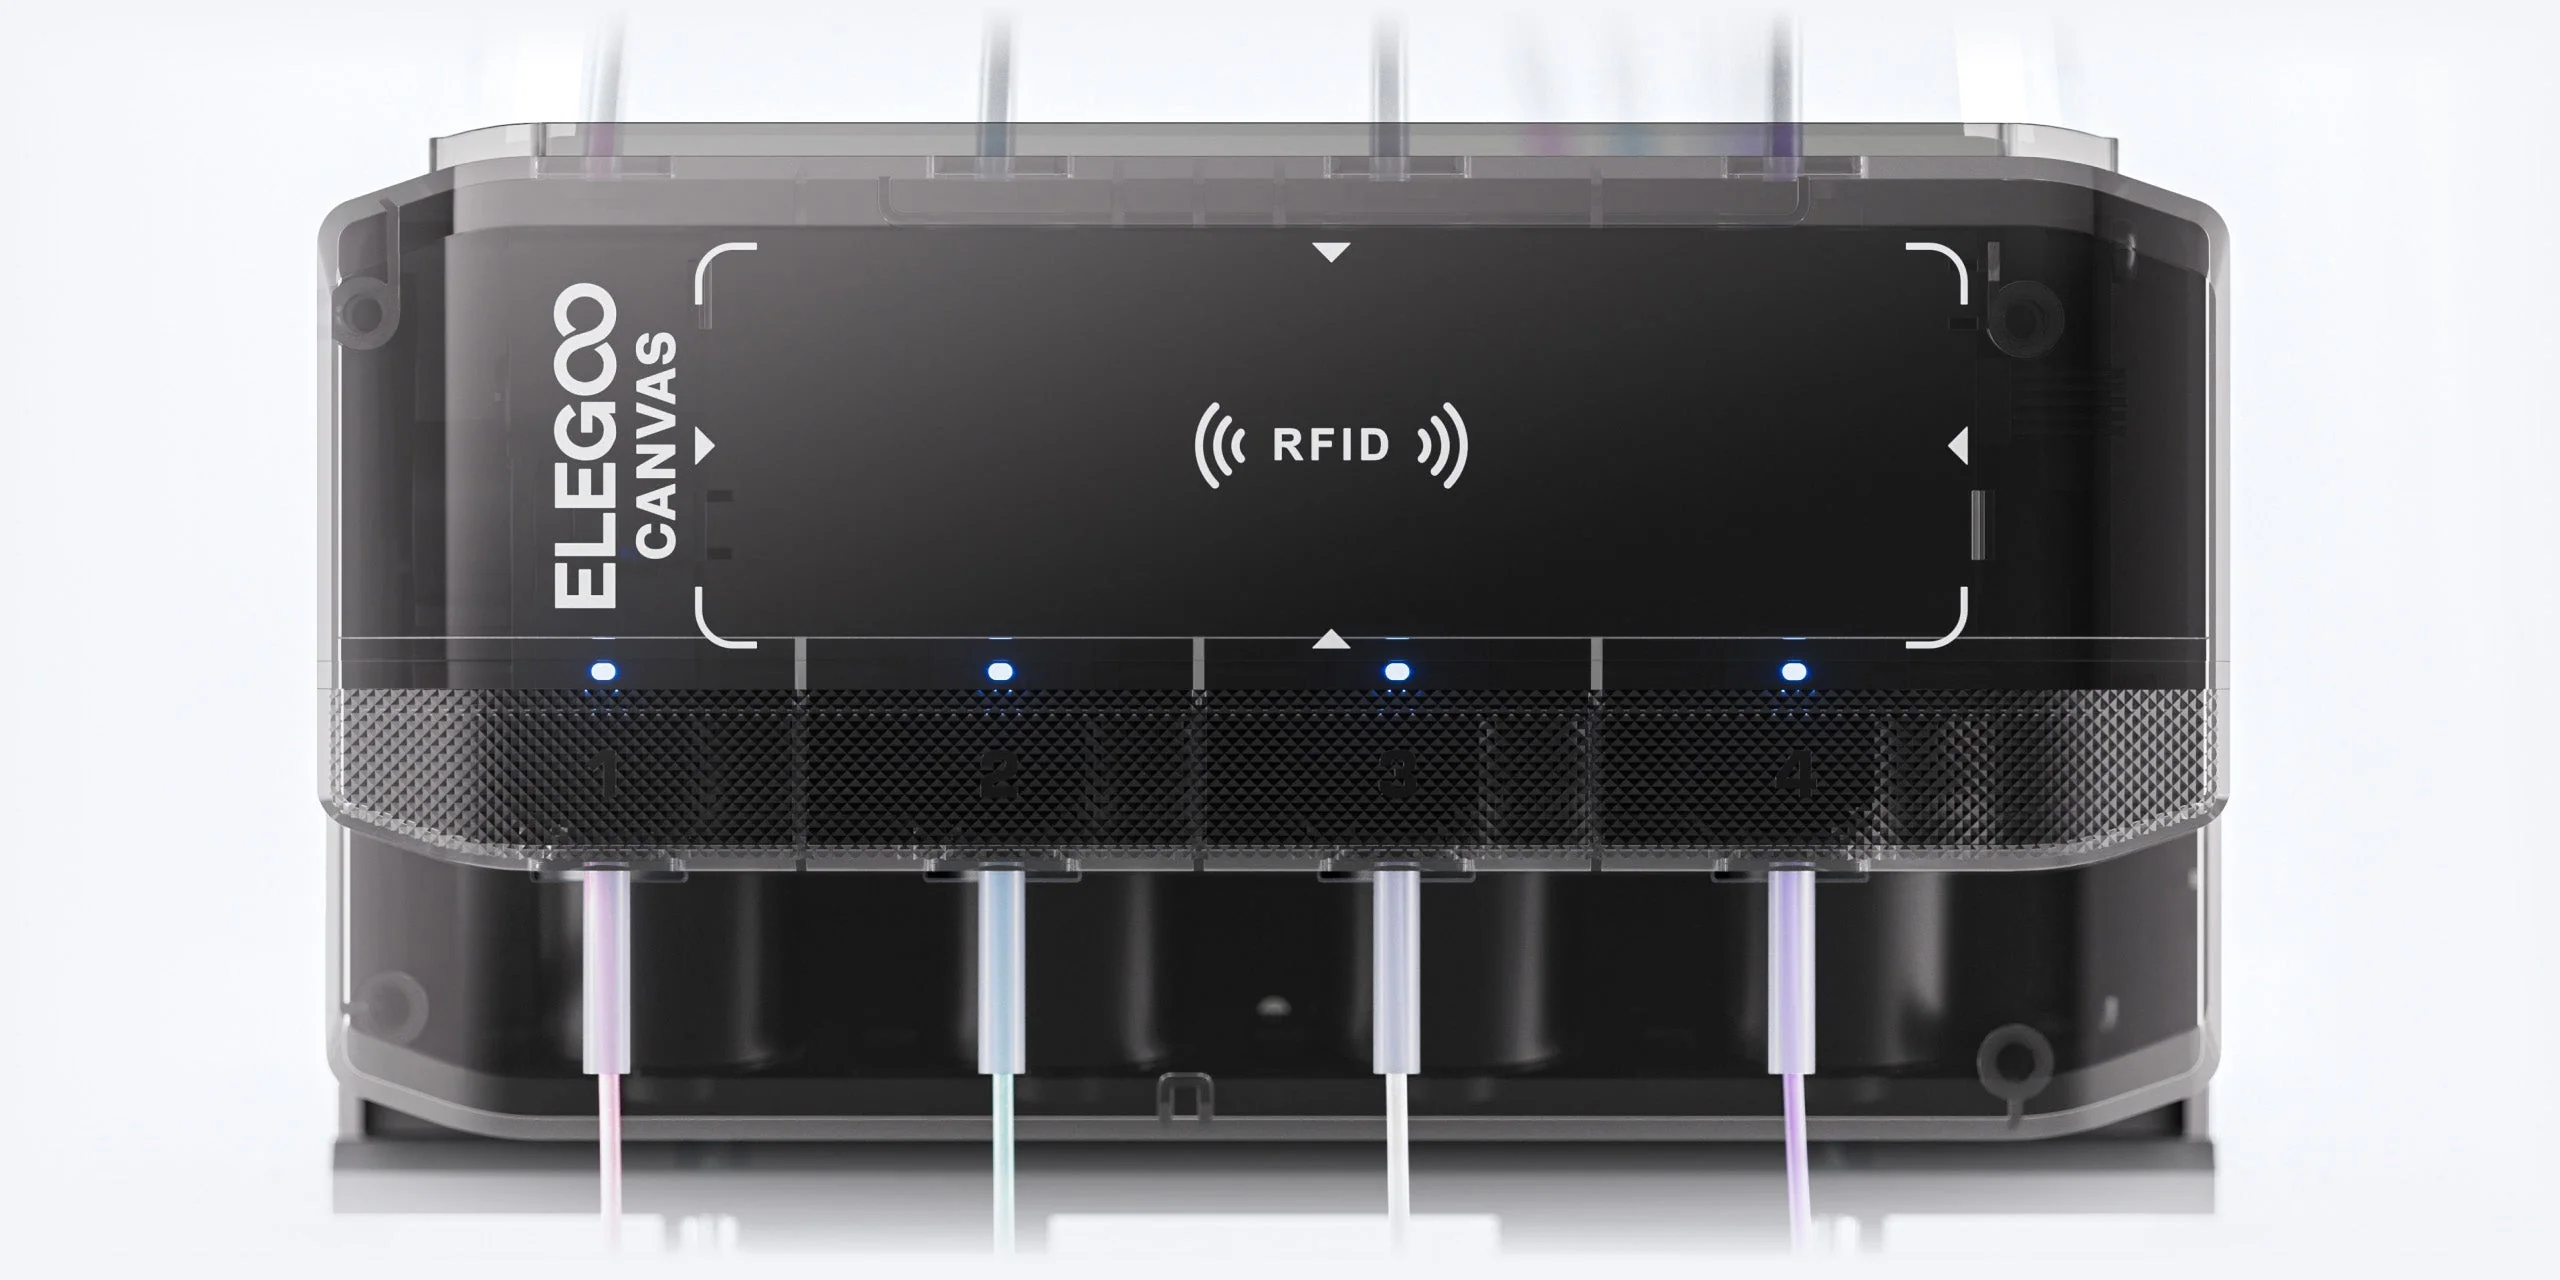
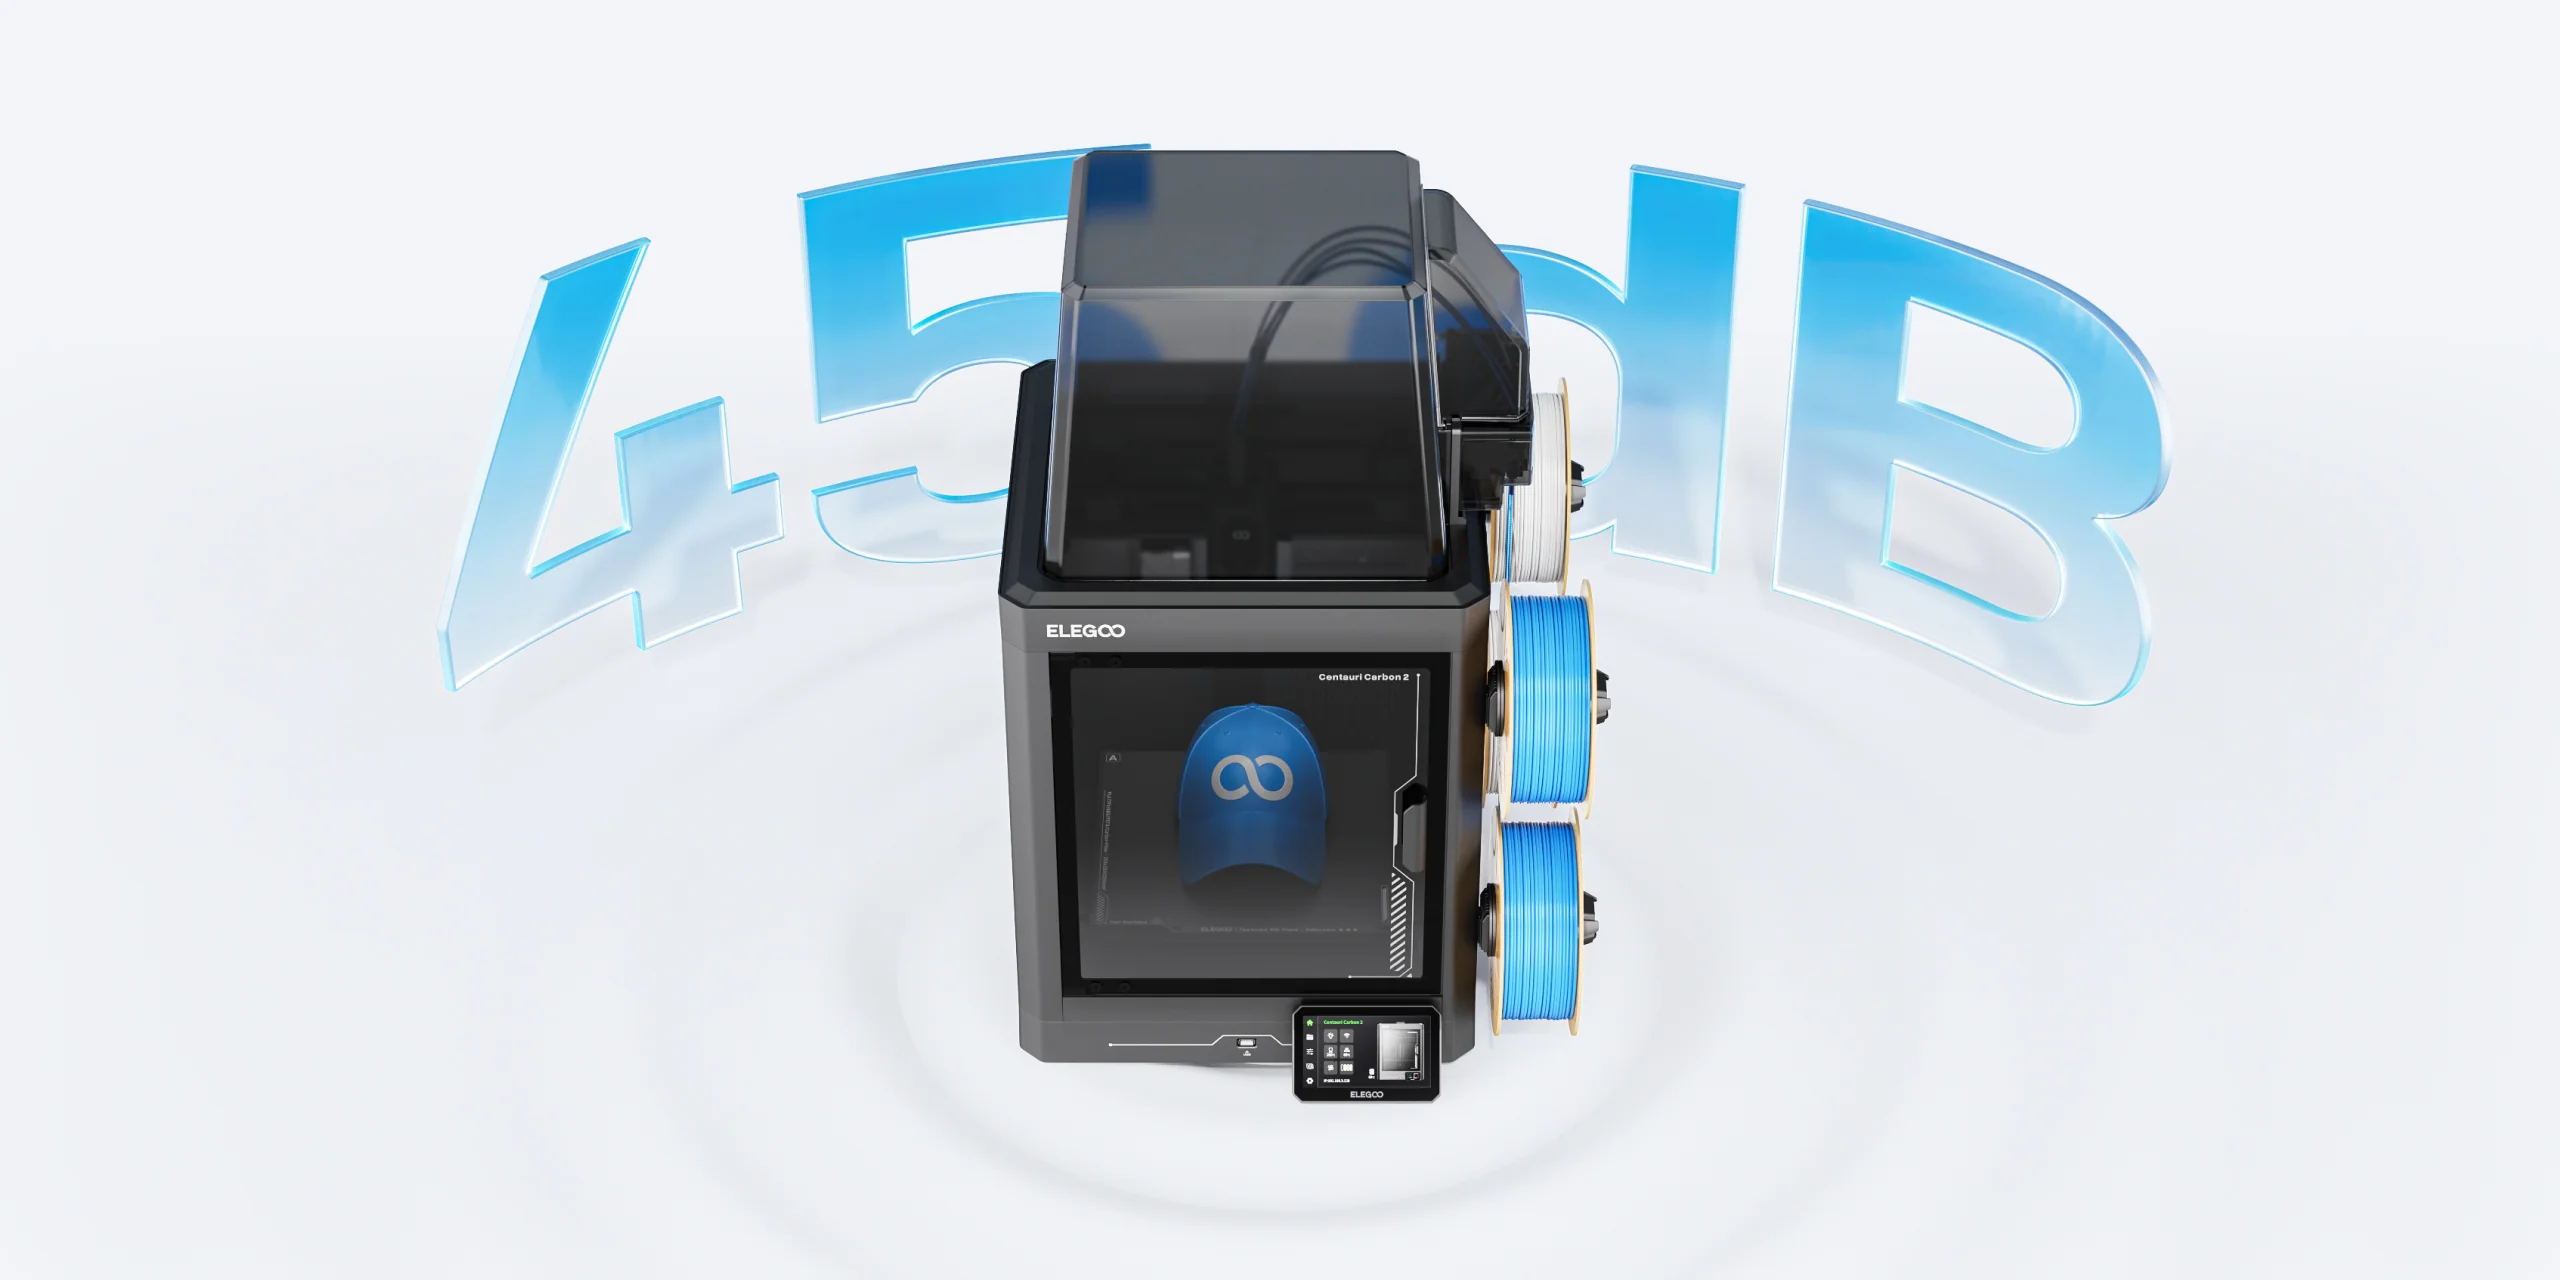
Traditionally, multicolour 3D printing has been a pursuit laced with complexity. Intricate purge towers, multiple extruders or tool-changing heads are often the price of entry. Elegoo’s new Carbon 2 family promises to change that narrative. With a CANVAS multicolour system that handles up to four filaments and even lets you switch colours mid-print, the Combo aims to bring vibrant, multi-hued prints to makers who might otherwise shy away from such workflows.
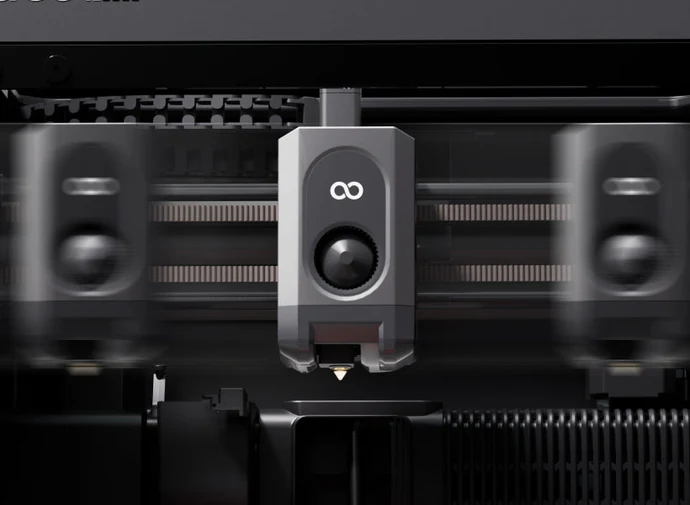
The heart of both machines remains faithful to what made the original Carbon such a joy: a CoreXY motion platform that sings with precision and speed, and a 256 × 256 × 256 mm build area that gives you room to dream — be it scenic terrain for your table-top battles or functional parts for your next project.
For those who relish material versatility, the Carbon 2 and Combo step things up with a 350 °C hardened steel nozzle, letting you venture beyond PLA into PETG, TPU and engineering-grade filaments that demand a bit more heat. Auto-leveling and intelligent sensor systems help reduce the faff of setup, giving you more time at the keyboard tweaking slicer settings or sipping tea as layers stack into life.
Watching a four-colour print unfold is something special. The transparent glass door on the Combo lets you glimpse that slow symphony of motion as filament dancers on their own tiny stages blend and separate to form gradients and patterns that used to be the exclusive domain of much larger machines.
From a personal perspective, the arrival of these printers feels like watching a familiar friend return from an extended journey having brought back new skills and stories. There’s a tangible sense that desktop additive fabrication is growing up, without leaving the joy of hands-on making behind.
Both models are now available direct from Elegoo’s UK store and global channels, with the Combo bringing multicolour creativity within reach of hobbyists, educators and professionals alike. Prices start at an accessible point for what is fundamentally a step change in capability, and if you’ve ever found yourself yearning for more expressive prints without wanting to wrestle with complexity, these new Carbon 2 machines may be the ticket.
As with all tools of creation, the true magic isn’t in the spec sheet or glossy launch photos — it’s in the quiet hours spent watching your imagination take shape, layer by patient layer.
There is a moment in every workshop when the familiar hum of a machine reminds you how much heat is being generated just out of sight. Whether you are shaping a design with a laser cutter or pushing a long print through the night, both processes rely on concentrated heat and electronics working in perfect harmony. Most of the time everything behaves exactly as expected, but all it takes is a small fault, a stray ember or a damaged cable to turn that hum into something altogether more worrying.
Fire safety is rarely the glamorous side of making, yet it is one of the most important. Over the years I have seen how quickly a small flare can take hold and how easily it can damage tools, materials and the room around them. The risks are low, but they are real, and a little preparation can make an extraordinary difference.
The usual advice stands. Keep machines clean, check wiring regularly, make sure ventilation is clear and never leave cutting material that contains adhesives or unknown coatings unattended. Smoke and heat detectors are essential, as is good airflow and sensible layout. These form the invisible foundation of a safe workshop. They work quietly in the background and never ask for attention.
Then there is the final line of defence. The moment when you see something beginning to smoke or flame and you know you have only seconds to stop it becoming anything serious. Traditionally this has meant reaching for a dry powder extinguisher or a CO2 cylinder. Both will deal with a fire effectively, but both have their drawbacks in a small workshop. Powder settles everywhere and can ruin equipment long after the flames are out. CO2 works well but tends to be large, heavy and not always convenient if you need something you can grab in an instant.
This is where the Fire Safety Stick becomes so valuable. I keep one mounted on the wall near my machines for one simple reason. It allows me to deal with a developing fire without coating the entire workspace in a layer of residue that could permanently damage the very equipment I am trying to save. It produces no settling dust and no lingering film. Once the flame is out there is no clean up and no lasting harm to delicate components, optics or electronics.
The Fire Safety Stick answers many of the concerns that makers often raise. It is compact, straightforward to operate and requires no servicing. It can be used on the types of fires likely to occur around 3D printers and laser cutters, and because the discharge is clean, it allows you to act quickly without wondering how much collateral damage you are about to create. In a space filled with tools, materials and sensitive hardware, that freedom matters.
Fire Safety In The Workshop: Why A Simple precaution Makes All The Difference
This does not replace sensible precautions. It simply adds a layer of protection that fits naturally into the rhythm of a workshop. You can strike it, place it near the source of the problem and step back, letting it continue to suppress the fire while you stay safe. It buys time, and in an environment where heat and electronics are always working together, time is the most valuable thing you have.
I encourage anyone who spends hours printing, engraving or cutting to think seriously about fire safety. It is easy to assume that nothing will ever go wrong, but experience has taught me that peace of mind is something you only appreciate after the moment you wish you had it. A clear workspace, a basic understanding of your equipment and a Fire Safety Stick within reach is a simple combination that gives you that reassurance.
In a world filled with clever tools and creative possibilities, sometimes the most important equipment is the one you hope you never need to use.
Fire Safety Stick is available in 50 second and 100 second discharge rates and are available from Amazon at https://amzn.to/48fRCob
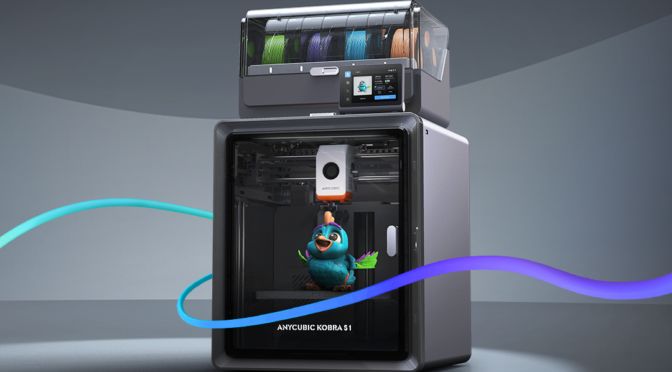
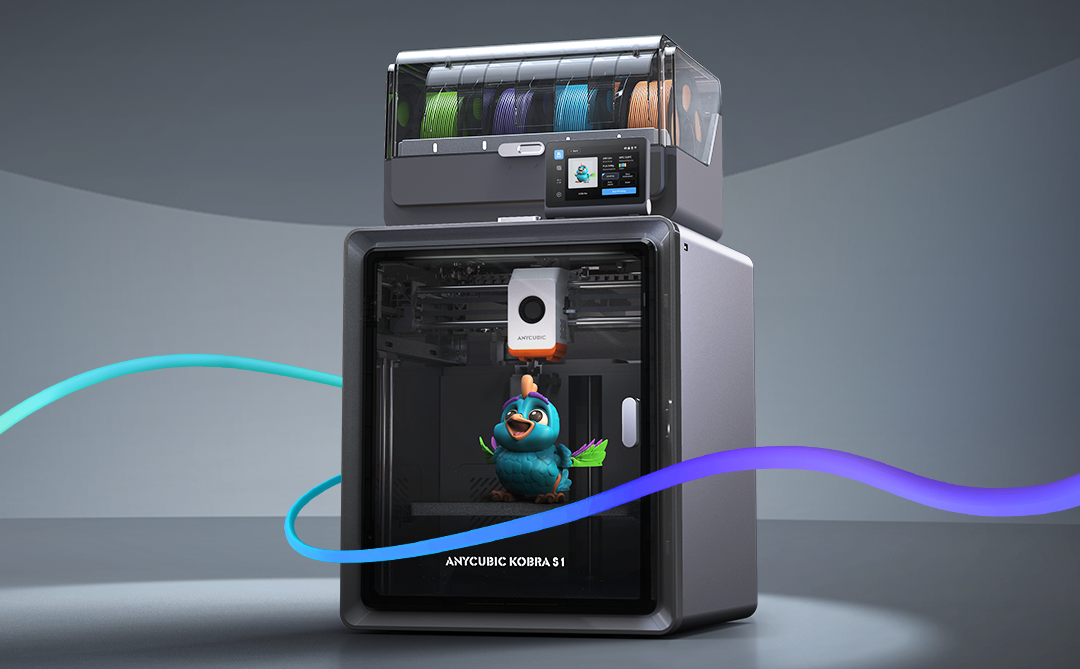
If you’ve been following my reviews on The Gadget Man, you’ll know I have a deep appreciation for innovation and practicality, particularly when it comes to tech that enables creativity. Enter the Anycubic Kobra S1 – a device that has transformed my 3D printing experience and firmly established itself as an indispensable tool in my workshop. After clocking over 100 hours of printing with this machine, I can confidently say it’s a game-changer in the world of consumer-grade 3D printers.
Anycubic Kobra S1 Combo
Dimensions and Specifications
The Anycubic Kobra S1 Combo boasts a compact yet highly functional design. It operates at 46dB in standard mode and an impressively quiet 44dB in quiet mode, making it suitable for home and office environments. The maximum nozzle temperature of this printer reaches an impressive 320°C, allowing for compatibility with a variety of filament types. Additionally, the print head features a quick-release mechanism, simplifying maintenance and filament swaps. With a build volume of 250 x 250 x 250 mm, it offers ample space for a wide variety of projects while maintaining a manageable footprint. The printer’s enclosed design ensures consistent environmental conditions, and the carbon filter reduces fumes, particularly useful when printing with materials like ABS. The sturdy frame and high-quality components reflect Anycubic’s commitment to durability and reliability. The machine’s heated bed, capable of reaching temperatures up to 120°C quickly, is paired with a magnetic PEI print bed, ensuring excellent adhesion during printing and easy removal of finished models. and its precision extruder provide a professional-grade 3D printing experience.
Anycubic S1 Combo – CoreXY 3D Printer – An indispensable tool for professionals and hobbiests
Unboxing and Package Contents
The Anycubic Kobra S1 arrives neatly packaged with everything you need to get started. The box includes the main printer components, a toolkit, a sample filament, the 4-reel multi-colour ACE unit, and a detailed user manual. The inclusion of these extras reflects Anycubic’s commitment to delivering value and convenience to users. The unboxing experience is satisfying, and the care in packaging ensures everything arrives in pristine condition.
Assembly and Initial Setup
Straight out of the box, the setup process is impressively straightforward. The clear and concise user manual walks you through installing the print head, screen, and filament holder. Even for those new to 3D printing, the step-by-step instructions make assembly approachable and stress-free. Connecting the multi-colour ACE unit is a simple task, and the machine is designed for intuitive use. Within an hour, I had the printer fully assembled and ready to begin its first calibration.
One standout aspect of the setup process is the printer’s resonance compensation system. During initial configuration, the Kobra S1 moves the print head rapidly in a controlled pattern to measure vibrations. This data allows the printer to adjust and compensate for resonance during printing, resulting in smoother, more accurate outputs. This feature is particularly impressive as it demonstrates Anycubic’s dedication to precision and innovation.
Anycubic S1 Combo – CoreXY 3D Printer – An indispensable tool for professionals and hobbiests
Software and User Interface
The Anycubic Kobra S1 supports widely-used slicing software like Cura and Anycubic’s own Photon Workshop. It is compatible with a range of nozzle diameters, including the standard 0.4mm as well as 0.2mm, 0.6mm, and 0.8mm options for expanded versatility in project designs. These platforms offer intuitive interfaces and extensive options for fine-tuning your prints. Once the software is installed, connecting the printer is a breeze, and the user-friendly touchscreen interface on the printer itself makes controlling print jobs straightforward. It’s a well-thought-out ecosystem that bridges functionality and ease of use.
Performance and Material Versatility
In terms of performance, the Kobra S1 punches well above its weight. I began with PLA and PLA+, and the results were remarkable. Prints exhibited exceptional precision, fine details, and consistent layer adhesion. The enclosed design minimizes environmental factors, ensuring stable and reliable results.
Venturing into ABS printing was where the Kobra S1 truly shined. The enclosed chamber with a carbon filter ensured stable temperatures, reducing warping and odours. The heated bed and high-performance extruder proved their worth, handling ABS effortlessly and delivering smooth, robust prints. The addition of the multi-colour ACE unit enabled stunning multi-material prints, allowing for creative designs that were previously out of reach with single-extruder systems.
Before using the Kobra S1, I was limited to manual filament changes when attempting multi-colour prints. The Kobra S1’s full support for multi-colour printing has been a revelation, saving time and reducing errors. However, it’s worth noting that the use of prime towers for filament flushing can lead to some filament waste, a consideration for those conscious of material efficiency.
Standout Features
The heating 4-reel multi-colour ACE unit is undoubtedly the crown jewel of the Kobra S1. This innovative unit is also heated, allowing for in-print filament pre-heating, which ensures consistent material flow and print quality. The quick-release print head further enhances convenience, making it easy to swap or maintain the unit. The Kobra S1 also supports advanced features like Pressure Advance and Flow Calibration, ensuring optimal performance and precision across a range of printing scenarios. This innovative unit is also heated, allowing for in-print filament pre-heating, which ensures consistent material flow and print quality. This advanced feature facilitates seamless multi-material and multi-colour printing, unlocking unparalleled creative potential. Whether it’s intricate models, functional prototypes, or artistic creations, the ACE unit’s reliability and precision make it a joy to use.
Another highlight is the auto-levelling system. This feature eliminates one of the most common frustrations in 3D printing—manual bed levelling. With the Kobra S1, you can count on a perfectly levelled print bed every time, ensuring optimal print quality from the very first layer.
Safety and Maintenance
Anycubic has also prioritised user safety and maintenance ease. The enclosed design minimizes exposure to fumes, especially when working with ABS. Routine maintenance is simplified with easy access to key components and a helpful guide in the user manual. The sturdy build ensures durability, making this printer a long-term investment.
Value for Money
The Anycubic Kobra S1 stands out as an affordable yet feature-rich 3D printer. Priced competitively, it delivers professional-grade results that rival much more expensive models. With its ability to handle a wide range of materials, including PLA, PLA+, and ABS, and its advanced multi-material capabilities, the Kobra S1 offers exceptional value for hobbyists, tinkerers, and small businesses alike.
Conclusion
In conclusion, the Anycubic Kobra S1 sets a new standard for consumer-grade 3D printers. Its versatility, reliability, and professional-grade performance make it a standout choice for both beginners and experienced makers. From the heating 4-reel multi-colour ACE unit to its intuitive design, exceptional print quality, and advanced resonance compensation system, this printer offers an unparalleled user experience. If you’re in the market for a feature-packed 3D printer that doesn’t break the bank, the Anycubic Kobra S1 is a top contender. Highly recommended!
Don’t forget to enter the special offer code GADGETMAN to get a further £20 discount on your order!